How To Reset E-Bike Controller?
As an Amazon Associate I earn from qualifying purchases.
Resetting an e-bike controller is a straightforward procedure that can breathe new life into your electric bicycle. If you’re troubleshooting issues, customizing settings, or simply seeking to restore your e-bike to its factory defaults, the process is accessible to riders of all technical skill levels.
In this comprehensive guide, we will teach you how to reset your e-bike controller, covering the ins and outs of the procedure, its benefits, and what to consider before diving in.
By the time you finish reading this guide, you’ll have the knowledge and confidence to reset your e-bike controller like a pro.
Understanding Your E-Bike Controller
Before we dive into the nitty-gritty of resetting an e-bike controller, it’s essential to have a basic understanding of what an e-bike controller is and how it operates.
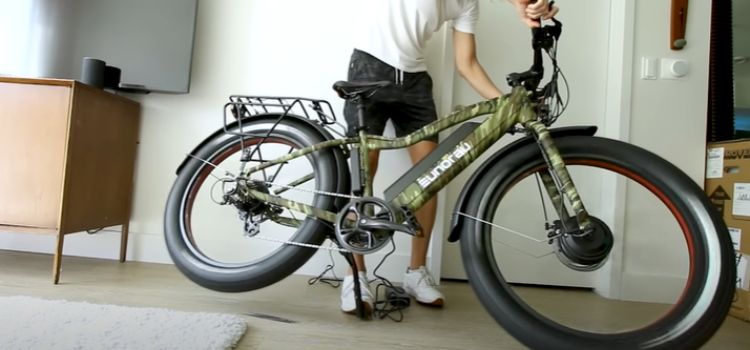
The e-bike controller serves as the central nervous system of your electric bicycle, orchestrating and regulating various aspects of its performance. Its primary role is to establish the connection between the power source (usually the battery), the motor, and the various sensors, ensuring the smooth operation of your e-bike.
Within the controller, a circuit board manages the flow of voltage and amperage, overseeing functions that are integral to your e-bike’s performance.
These functions can include regulating motor power, maximum speed, pedal assist levels, voltage cutoff thresholds, integrated lighting, and even managing built-in displays if your e-bike features one.
In essence, the e-bike controller is the bridge between the power supplied by the battery and the work done by the motor, ensuring that the e-bike operates efficiently and in response to user inputs and data from sensors.
Why Reset Your E-Bike Controller?
There are several compelling reasons why you might find yourself needing to reset your e-bike controller. Resetting the controller is a common troubleshooting step to address various issues that can crop up within the system.
These issues might include resolving error codes, fixing problems related to the motor or battery, or even restoring the default settings after making customized changes.
Here are some key reasons for resetting your e-bike controller:
Error Resolution
If your e-bike controller displays error codes or behaves abnormally, a reset can often clear these issues, as it reverts settings to their default, error-free state.
Customization
If you’ve customized the settings and wish to return the manufacturer’s recommended parameters, a reset is the way to go.
Troubleshooting
If your e-bike has motor or battery issues, reset the controller. It’s a valuable first step in addressing problems.
Performance Enhancement
Resetting the controller can lead to improved performance, as it ensures that your e-bike operates optimally based on factory settings.
Step-by-Step Guide: How to Reset an E-Bike Controller
Now that you understand the importance of resetting your e-bike controller. Let’s dive into the step-by-step guide to performing this procedure:
Step 1: Power on
Begin by turning on your e-bike’s battery using the control panel on your e-bike controller. This step is fundamental, as it ensures that the controller has access to power.
Step 2: Locate the Function Button
Next, you’ll need to locate the function button on your e-bike controller. Typically, this button is used to access and modify settings. Press and hold this button for three seconds.
Step 3: Use the Up and Down Buttons
Once you’ve held the function button for three seconds, find the up and down buttons on your e-bike controller and hold them simultaneously for three seconds. This action will prompt the e-bike controller to display the default settings on its screen.
Step 4: Navigate to the Default Settings
As you see the default settings appear on the screen, you’ll notice a blinking section indicating the current setting. You can cycle through different parameter settings by using the function button in the middle and pressing the up and down buttons.
Step 5: Select the P1 parameter
Choose the P1 parameter from the list of possibilities by pressing the function button located in the center of your e-bike controller. The P1 parameter often deals with motor characteristics such as voltage, frequency, and motor performance based on different values.
Step 6: Transition to the C Parameter
After you’ve set the e-bike controller to the P1 parameter, proceed to the C parameter settings. To do this, hold down the function button while pressing the up and down buttons. This action will transition you to the C parameter settings.
Step 7: Choose the C5 option
Within the C parameter settings, find and select the C5 option by pressing the function button. The C5 parameter often deals with the maximum operating current.
Step 8: Adjust the C5 value
Once you’ve selected the C5 option, adjust the C5 value to “1” by using the up and down buttons on your e-bike controller.
Step 9: Save the Setting
To save the selected value, hold the function button for three seconds. Once saved, the screen will return to the main display, signaling that your new setting is in place.
Step 10: Complete Reset with the C10 Parameter (Optional)
If you want to perform a full reset of the e-bike controller’s functions, follow the previous steps but select the C10 parameter instead. Choose “Y” to initiate the factory reset process.
By doing this, the e-bike controller will return to its initial factory configuration. Note that this step is optional, and you should only proceed if you wish to reset all settings to their default values.
Understanding Parameter Settings in Depth
To maximize your understanding of the e-bike controller, it’s crucial to delve deeper into the meaning of various parameters:
P Parameters:
P1: This parameter typically deals with motor characteristics, including information about voltage, frequency, and how the motor performs under different conditions. It’s advisable not to alter this value unless you are well-versed in the intricacies of motor performance.
P2: This parameter often controls the speed sensor of your e-bike. It’s useful to check the default value in your manufacturer’s manual if you suspect issues with the speed sensor.
P3: This parameter influences your Pedal Assist System (PAS) and usually ranges from 0 to 5. A value of zero means you rely solely on the PAS system, while a value of five implies you depend on throttle power exclusively.
P4: This parameter determines the behavior of the throttle when starting. It has two values: 0 or 1. A value of 0 means the throttle activates the motor when triggered, while a value of 1 requires pedaling before the throttle engages the motor.
P5: This parameter affects how your controller monitors the motor and battery. It’s recommended not to modify these settings, as incorrect values can lead to inaccurate information about your battery’s charging levels.
C Parameters:
C1: This parameter relates to the throttle’s startup settings. You should consult your manufacturing manual to set your preferred manual settings for C1.
C2: This parameter involves the motor classification code, typically used with sine wave drive motors.
C3: This parameter controls the power assist ratio gear, typically with values ranging from 0 to 5. A value of zero signifies minimal pedal assistance from the motor, while a value of five indicates the highest level of assistance.
C4: This parameter is used to set up your e-bike’s handlebar settings.
C5: As previously mentioned, C5 is crucial for resetting the maximum operating current and returning the controller to its default settings. Always consult your e-bike manual before making any changes to this value.
C6: This parameter is responsible for controlling the backlight of the LCD display, with values ranging from 1 to 5, where one represents the lowest brightness and five the highest.
C7: If your e-bike controller features a cruise function, C7 allows you to enable (1) or disable (0) it.
C8: This parameter provides insights into motor temperature settings.
C9: C9 is used to set up a password for your function panel, enhancing security.
C10: As mentioned earlier, C10 performs a factory reset, returning all settings to their default values. If you wish to reset everything, including customized configurations, choose “Y” and save it.
C11: This parameter often relates to LCD attribute settings and typically ranges from 0 to 2.
C12: This parameter determines the minimum operating voltage and is generally advisable to leave unchanged.
C13: C13 controls ABS brake settings.
C14: This parameter influences power assist tuning settings, allowing you to select from options such as three (highest) or one (lowest).
Final Words
Resetting your e-bike controller is not a complicated process, but it’s essential to approach it with caution and a clear understanding of your e-bike’s settings.
While this guide provides comprehensive instructions on resetting your e-bike controller, it’s crucial to consult your manufacturer’s manual and, if needed, seek advice from experts or your e-bike dealer.
Taking the time to research and understand your e-bike’s components, including the controller, will not only enhance your riding experience but also save you time and money in the long run.
By following the step-by-step process outlined in this guide and respecting the intricacies of P and C parameters, you’ll be well-equipped to reset your e-bike controller whenever the need arises.
Resetting can help you troubleshoot issues, restore factory settings, and ultimately ensure that your e-bike performs optimally, providing you with a safe and enjoyable riding experience.
So, the next time you encounter issues with your e-bike, don’t be hesitant to reset the controller—it might be just the solution you need to get back on the road and enjoy the freedom and thrill of electric cycling.
Amazon and the Amazon logo are trademarks of Amazon.com, Inc, or its affiliates.
